

If you’re like me, you are always on the look-out for something fun, crafty and kid friendly to keep your littles entertained and out of trouble. To me, the quintessential summer craft is tie-dye and thanks to modern fashion it is making a major comeback. But, alas, IT IS MESSY. I remember dying t-shirts as a kid. It seemed like we spent hours wrapping, and dipping and painting and invariably one of us turned a body part blue and permanently stained a piece of furniture. These are childhood memories I cherish, but a housekeeping catastrophe I was not eager to repeat as a mom. Then I recently stumbled upon this method and after a bit of experimentation on my part, I am declaring it the: minimal-mess, super-child-friendly, wicked-mom-friendly, method for bringing tie-dye joy to the masses.
[typography font=”Cherry Swash” size=”30″ size_format=”px” color=”#44c3c7″]Materials[/typography]
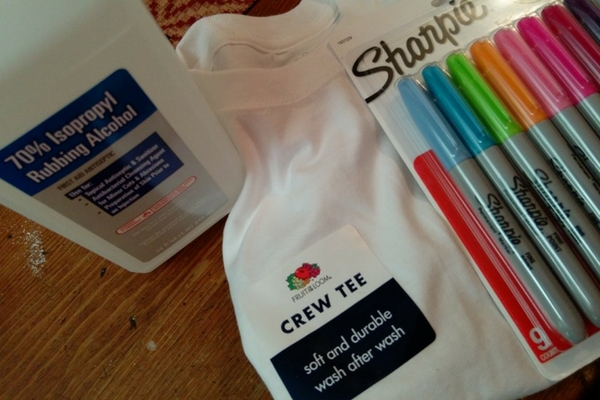
White T-shirt
Sharpie Markers
Rubbing Alcohol
Rubber Bands
[typography font=”Cherry Swash” size=”24″ size_format=”px” color=”#44c3c7″]Basic Method[/typography]
[pinterest count=”horizontal”] 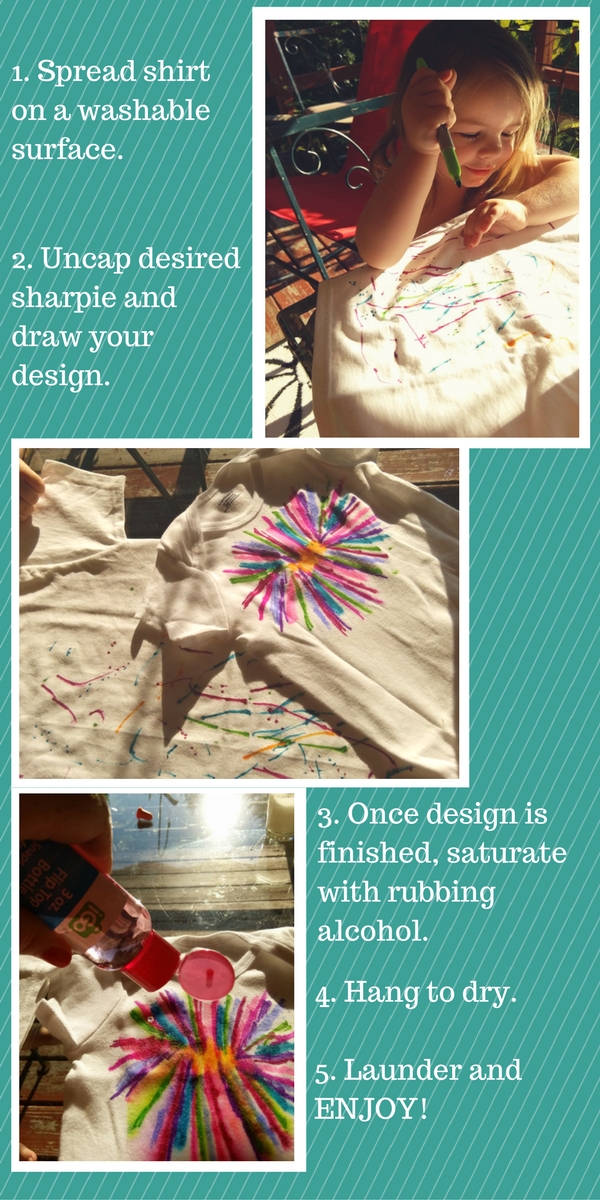
[typography font=”Cherry Swash” size=”24″ size_format=”px” color=”#44c3c7″]Traditional Method[/typography]
[pinterest count=”horizontal”] 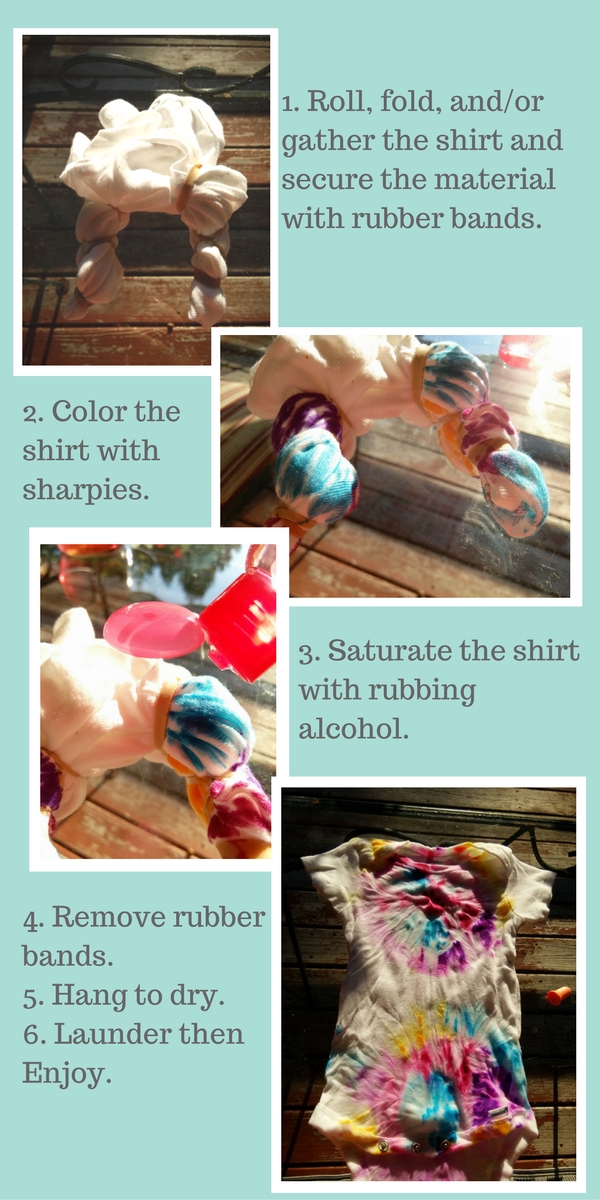
[box style=”rounded” border=”full”][typography font=”Cherry Swash” size=”24″ size_format=”px” color=”#44c3c7″]Tips and Tricks[/typography]
If you like you can use an embroidery hoop to hold the material taught, but my 2-year old did fine without it.
You can also place a piece of cardboard between the layers of the shirt if you don’t want the design to bleed onto the back.
A great resource for making amazing Tie-dye designs can be found here[/box]
Basic Method
- Spread shirt on a washable surface. If you like you can use an embroidery hoop to hold the material taught, but my 2-year old did fine without it. You can also place a piece of cardboard between the layers of the shirt if you don’t want the design to bleed onto the back.
- Uncap desired sharpie and draw your design.
- Once your design is finished, saturate it with rubbing alcohol.
- Hang to dry.
- Launder and ENJOY!
Traditional Method
- Roll, fold, and/or gather the shirt and secure the material with rubber bands.
- Color the shirt between bands with sharpies.
- Saturate the shirt with rubbing alcohol.
- Let shirt sit for a few minutes before removing rubber bands.
- Hang to dry.
- Launder then Enjoy.


The sharpie approach is much easier and much less mess than the dye approach. A great craft to keep the tireless kids busy for a few hours in the summer. Thanks for sharing.
Comments are closed.